Monday, February 28, 2011

Once Upon a Springtime **Sketchabilities**

Hello and welcome to my blog today. Holy can you believe that tomorrow is March already!!! Yippee that means I have 2 kits coming and Spring is on its way, and what better layout to do than a springy looking one. This is my second layout since I joined Sketchabilities. They create a sketch twice a month and inspire everyone to create outside of their comfort zones. For this layout I used sketch#42. The layout is called “Once Upon a Springtime” and the three photos are of my nieces new baby girl. I used G45 papers and the rest from my stash. The G45 papers are so much fun to work with. I distressed the layers and did a lot of fussy cutting on the little fairies.
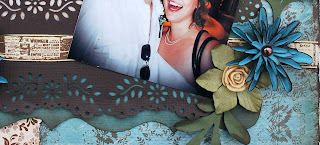
In this close up on the bottom you can see the little fussy cut fairies sitting on the flowers. The pink flowers are just randoms that I bought and the turquoise flowers are Prima. You can really see the distressing in this close up as well. 
I tucked a doily under the title section and added some more flowers and fairies. I love the little fairies sitting in the flowers.
And that is it, my little bit of Spring time. Now if it would only quit snowing and melt so it would feel like spring that would ROCK! Thank you so much for stopping in for a peek. I hope that you all have a fantastic week, be safe and stay warm. Feel free to leave me some scrappy love comments, I love reading them ...take care and happy scrapping J

Sunday, February 27, 2011

"Moms" Flower Tutorial

I figured it is about time I get this tutorial on here. These are really easy to make and if you just try one you will see that. Then you can dress up all your layouts with any color flower you want.

Supplies

Cardstock
Skewer stick
Glue – I use my glue gun
Inks
Glimmer mist or perfect pearls mist
Gems or Stickles, something for the centers of the flowers

First you need to cut out 5 to 8 petals. I use my cricut because you need different sizes for these flowers. There are many cricut cartridges with flower templates on them. I assume you can use any die cut machine if you can change the sizes of the die cut?
Here are the sizes I use for the larger flower.
2 ¾ inches, 2 ½, 2 ¼, and so on down to 1 inch. The larger flower has eight cut outs and the smaller flower I use the last five cut outs.
Fist step that I do is I mist the petals with water. You take the skewer and roll the petals towards you and pinch them at the same time. They will look like this after this step is done.
Now you can let them dry for about 15 minutes or so but I get impatient and use my heat gun on them so that I can finish them up right away. This is what they look like at this point now.
Once dried, I add some ink to the edges of the petals.  The next step is you glue all the petals together, alternating which way each petal goes. Then you just add a gem or pearl to it. For a nice pearly finish I like to spray the completed flowers with Perfect Pearls or Glimmer mist.
These take about 10 minutes to make and really they are so simple. I love the look of them. Here is a close up of an upcoming layout with some of the flowers on it. One large and four small ones. Have fun and I hope you enjoyed the tutorial.
Thank you so much for stopping in for a peek. I hope that you all have a fantastic weekend, be safe and stay warm. Feel free to leave me some scrappy love comments, I love reading them ...take care and happy scrapping J

Thursday, February 24, 2011

Brothers & Sisters **Swirlydoos**

Hi and welcome to my blog. Yippee it is Friday, TGIF, and that means it is Round Robin day at Swirlydoos. This is my week to participate in the challenge and I am lifting from 3 gorgeous layouts that went before me. The layout is called “Brothers & Sisters”. Last fall it was my sister in laws 50th birthday so we all went to Vegas to celebrate it. The photos are of me and my DH, my two brothers and my 2 sister in laws. I used Webster’s paper as the main paper, and cardstock for the punched circle and background.  I added some pearls and flowers to the circle, and bits of paper behind the main photo. That’s ME in the middle on top J
In this close up you can see all the distressing and inking that I did on the layers. I water distressed the Webster’s paper. You can also se the punched circle here again and the pearls and flowers that I added to it.
In the other corner I added a Dusty Attic scroll. I first painted it white then added some inks and stickles and crackle accents to it. When it was dry I added a few gems to it. The butterflies were cut out then I added some stickles to them.
In this close up are the flowers that I made. The tiny glass flowers were made with UTEE and I added some stickles to the centers. The large blue flower is GORGEOUS and is made from a coffee filter, yepp I said coffee filter. How awesome is that! There is a great tutorial at Swirlydoos and you can check out both flower tutorials here. I made the leaves and tucked them in with a couple of feathers and some green bloomers. I added another Dusty Attic scroll to finish it off, I altered it the same as the other piece.  I really love this layout, and the way that blue flower just pops.
I have lots of scrappy plans for this weekend. I have 2 more layouts half completed and I am finally going to do that flower tutorial that I keep promising.  Thank you so much for stopping in for a peek. I hope that you all have a fantastic weekend, be safe and stay warm. Feel free to leave me some scrappy love comments, I love reading them ...take care and happy scrapping J

Wednesday, February 23, 2011

Dusty Attic Giveaway

Huge congrats to Vicky Alberto, she is now a new Dusty Attic Retailer and will be carrying all the goodies in her Etsy Shop.  While she waits for her shipment to arrive check out the awesome give away that she is doing. 


Who does not want some free Dusty Attic Goodies :) YUMMMMM I want some :) So hope on over to her blog or Etsy for details on how to win these goodies

Have a great day see you next post :)

Tuesday, February 22, 2011

Giggles **TCR#46**

Hello everyone and welcome to my blog on this snowy February 22nd. First off I have to wish two of my grandsons a happy birthday. I hope Conner and Johnathan both have wonderful birthdays. Cousins born on the same day, kinda cool hey. Ok so today’s layout is for The Color Room #46 palette. This is my grand daughter last weekend when I went to visit. She is such a cutie pie. I just used everything from my stash for this layout.


I made three types of flowers for this layout and I made the leaves. You can see them in this close up. I tucked in a few trinkets here and there to fill up space.
I used a MS deep edge punch for the outer layer and water distressed and inked the top layer. The butterflies I cut them out, added some stickles and gems to them and used pop ups to adhere them to the layout. I tucked some lace in behind the photo and added someliquid pearls dots to it.
Here is another close up of the lace and butterflies and the title sticker. You can see a bit of masking that I did under the title.
In this close up you can see more of my homemade flowers and you can see the very back layer that is distressed and inked.
Well that is it for today. I will be adding my layout for the Swirlydoos Round Robin on Friday. Can you believe that it is almost March, yippee, that means Spring will be here soon.  I can’t wait for my new March kits to arrive, I have seen sneek peeks and they look so gorgeous. Thank you so much for stopping in for a peek. I hope that you all have a fantastic week, be safe and stay warm. Feel free to leave me some scrappy love comments, I love reading them ...take care and happy scrapping J

Wednesday, February 16, 2011

Timeless Memories


Hi and welcome to my blog today. Some exciting news before I get to my layout. I am the featured member at Scrapthat this month. I have been a member of their kit club since last year and I am always excited to get my kits each month. It was there that I was inspired to create my blog and there it started. The design team and owner are amazing and I am thrilled that they are featuring me and my blog. If you want to take a peek head on over there and learn more about me.
Ok so I decided that I love working with sketches so I joined Sketchabilities. They create a sketch twice a month and inspire everyone to create outside of their comfort zones. So here is my first try, I used sketch#41. The layout is called “timeless memories” and the two photos are my daughter and her hubby when they got married in Vegas. I used my Swirlydoos February kit “Things Remembered”.
In this close up you can see all the distressing and inking that I did on the layers. I cut the leaves from my cricut and inked the edges. The blue flowers I made and I added some rose bling to the centers of the Petaloo flowers. The cute little bird cage is a stamp. I just stamped some cardstock, cut it out and applied it with pop ups. The metal bling above the blue flower came with my kit.
I used a Martha Stewart deep edge punch and you can see another close up of my flowers here. I used some ribbon that came with my kit between the punched areas and I inked the edges of the blue cardstock to age it.
For the circle punch I used a corner punch from MS and I added a couple of rub ons with some pearls on the lighter paper. Swirlydoos has a great video tutorial on how to use your corner punch on a circle. Well that is it for this week. I am off to visit one of my kids for the weekend. I hope that I get lots of great photos to share with everyone.  Thank you so much for stopping in for a peek. I hope that you all have a fantastic week and weekend, be safe and stay warm. Feel free to leave me some scrappy love comments, I love reading them ...take care and happy scrapping J

Tuesday, February 15, 2011

A Wonderful Place to be **Swirlydoos & TCR #45**

Wow the week is just zooming by. I picked up the mail on my home from work and my package that I won at the Color Room was in. I got some very cool stamps and I can’t wait to try them out. Today’s first layout is for The Color Room #45 palette. I used TCR sketch and my February Swirlydoos kit. I did not have much for the palette colors so I had to do a lot of inking to make the papers work. This layout is called “together is a wonderful place to be” and the photo is my daughter and her hubby. What a couple of cuties.
I had to plan this layout more than I normally do because I wanted to machine stitch on it. I also had to do a lot of inking with distress inks to get the right colors. In this close up you can see the distressed layers, stamping, and the stitching. I made the purple flowers and the leaves. The white flowers and the Prima swirl are from my stash.
I used a Martha Stewart punch around the photo to frame it and did some water distressing and inking on the white papers on each side of the photo. I made the smaller purple flowers and the butterflies I printed them, cut them out, and added stickles to them.
In this close up you can see more of the machine stitching, flowers and butterflies. The title is a velum title and I added some ZVA gems beside it.

This next layout was done for a challenge at Swirlydoos. I had to use a WORK IT theme. Took me a while to come up with something to do for this one, as we all know, I struggle with “dude” layouts. But did that stop me, no. So some background on the photos, this is my DH and he is a logging truck driver. You can see him the photo by his nice new truck. Well a couple weeks ago coming off of the mountain, it was way too steep and too slippery and he almost went over the cliff. Yes that is the front of his truck hanging over a cliff, eeks. And he tells me to come along for a ride NO THANK YOU. Anyways the loader got him out and all was ok. The title is “Cliff Hanger” and I used lots of goodies on this one.
I used G45 papers as base layers and distressed, sanded and inked them. I love that cardstock it is so much fun to alter. I added a strip of ribbon that matched, and tucked in a piece of water distressed paper in the corner. Tip, if you ink the creases on the water distressed edges it just makes them pop off the page.
The next two close ups show the distressed G45 pieces that I added in. I added some liquid pearl dabs on them and inked the edges. If I can not use flowers I am using some liquid pearls J I added a few Tim Holtz fragments on this layout, they are fun to do, you just apply them to a piece of cardstock, cut them out and add to your layout.

In this close up you can really see the distressed and sanded layers. The title I just printed out and inked it. To finish off the layout I added a Dusty Attic piece in the corner. I first painted it with black acrylic and then I added some distress stickles to it with my finger. When it was dry I added some gems to it. In the end I do like the way this layout turned out, even though masculine layouts scare me, I always like them in the end.
So that is it for today, thank you so much for stopping in for a peek. I hope that you all have a fantastic week, be safe and stay warm. Feel free to leave me some scrappy love comments, I love reading them ...take care and happy scrapping J
Sunday, February 13, 2011

Timeless LOVE **Scrapthat and Dusty Attic**

Wow Sunday already…where do the weekends go? I think I need 5 days off a week and work 2 hehe J For this layout I used the February sketch from Dusty Attic, and I used my Feb. Scrapthat kit, “Love Notes”. The photo is my niece’s baby last weekend. What a little cutie pie.
I made my own flowers for this layout, the larger pink one is from hand painted silk (I used to make scarves…so I hacked one up), and the green ones are from cardstock with added inks and gems. The birdcage is from a stamp and I just cut it out and used pop ups on the layout. The cute little envelope came with the kit. I just inked it and added some liquid pearls and a stamp. I used a MS punch for the border strip and added some lace to it. The doily is inked with Distress inks.
You can see the punched area in this close up. The butterflies I cut out and added some stickles to them. The Dusty attic chippy, I first painted with black acrylic and then added some crackle to it. After that dried I added some stickles and gems.
I did regular distressing on the outer edges and water distressing with inking on the inner layer. There is a Tim Holtz acrylic fragment under the title.

Well thank you so much for stopping in for a peek. I have a few more layouts planned for the next couple of weeks for Swirlydoos, Dusty Attic, Scrapthat and the Color Room. I hope that you all have a fantastic Sunday and Happy Valentines Day tomorrow, be safe and stay warm. Feel free to leave me some scrappy love comments, I love reading them ...take care and happy scrapping J

Friday, February 11, 2011

love **Scrapthat Sketch**

I have been a member of Scrapthat for a few months now. The designers are all so talented and full of inspiration. I have followed all of their blogs for some time now. This months kit “Love Notes” is no exception. The design team all made gorgeous layouts with the kit.  There is a giveaway on the Scrapthat blog right now, so go visit it for your chance to win a kit.  I am featuring one layout that is based on my layout today. It was made by Vicky Alberto. Her style is so gorgeous and full of inspiration. You can see her blog here. Both of our layouts are based on the “Love Notes” sketch by LG Belarmino. Here is Vicky's below.

My layout is called “love” and the photo is my daughter and her new son. What a sweet photo, so full of love. I used my February kit and this months sketch. I did a lot of stitching on this layout and distressing.
The flowers all came with the kit and the little bird cage is a stamp that came with the kit. I just stamped some cardstock and cut it out. I added some pearls to the smaller flowers.
In this close up you can see all the stitching that I did on the layers, after I distressed them. I curled up the edges on the layers for some dimension.
The love title and vine is from Dusty Attic. I first painted the chippys, then I inked with a rose and olive color. I then added some clear stickles for some shine. I really love the way the vines turned out.
I used a MS punch to make the circle and you can see another close up of the stitching and vines here.
Well thank you so much for stopping in for a peek. Don’t forget to go visit Vickys blog and Scrapthats blog. Be ready to be inspired. . I hope that you all have a fantastic weekend, be safe and stay warm. Feel free to leave me some scrappy love comments, I love reading them ...take care and happy scrapping J